BLOG - Page 6 of 7 - GlobalSQA

18
Jun

How to Get Code Coverage with Jacoco and Espresso

How to Get Code Coverage with Jacoco and Espresso


Finding code coverage is very important for testing because it allows you to measure your testing efforts. If you have a test suite prepared for your application but you are not sure test suite covers how much percentage of code then finding the code coverage will be good practice Once you get the coverage report, you will know exactly what part of code is not covered in your test case and then you can add test cases to cover the code.

Jacoco is java code coverage tool which allows you to calculate code coverage for your unit tests and instrumented tests. Jacoco can be used with Ant, Maven & Gradle build tools. Today, I will show you step by step integration of Jacoco with Gradle for Espresso test suite.


I have done this setup for Simple Hello world project to give idea of how Jacoco works and gives proper code coverage report.

Pre-requisite –

  • Android Studio
  • Junit
  • Espresso Setup
  • Espresso Test Case written as per our previous post for “Hello Word”

How to Setup Jacoco and Get Coverage ?

    • Create an android project as shown in my previous post.
    • Create a java class inside src->main->androidTest and write your Espresso test case in the class
    • Create a new class named AndroidJococoTestRunner in src -> main ->androidTest and copy below code inside the class.
    • Open app-> build.gradle and copy below code in defaultConfig.
 

    • Then click on Gradle on right side of Android studio -> click on refresh -> other -> right click on createDebugAndroidTestCoverageReport -> click on run


    • This action will run all the test cases inside src->main->androidTest and give the report in app->build-> reports ->coverage -> debug.
    • pen index.html file in the browser to check the code coverage report as shown in below screenshot.

Jacoco_Code_Coverage1


17
Jun

How to Write and Run First Test Case in Android Studio?

How to Write and Run First Test Case in Android Studio?


So far we have learnt on creating our Android Studio project and overview of Junit and TestNG testing framework. In this Tutorial, we will write our first test case and run it. It sounds exciting but before that we need to decide a testing tool which we want to use for writing testing Framework.

We have many famous testing tools in market like Appium, Robotium , Espresso etc. Espresso is an open source framework provided by Android Studio so let use that to write our first test case.

The main purpose of this tutorial is to learn to write and run test case in Android Studio so we will focus on this and not on testing tools. We will learn about testing tools in future posts.

Perquisite –

  • Create an Android Studio Project
  • Configure TestNG Framework.
  • Configure Espresso Tool


Steps for Writing Test Cases –

      • Go to app -> src ->androidTest -> Java Android Studio


      • Right click on the package name


      • Go to New -> Java Class and click
      • Enter File Name and Click on Ok.
      • “Now your java class is ready.>

Now we will write a simple code as per given below

Test Case Explanation –

1. The class uses two annotations @LargeTest and @Runwith these two annotations are used to specify the behavior for our TestClass.
2. The class extends AcitivtyInstrumentationTestCase2 class with launch activity as MainActivity which we want to test in this example.
3. @Before and @After is annotations and used to specify which method should be executed before each test case and which method should be executed after completion of each test case.
4.@Test annotation is added for each test case method.
5. In the below test case the getAcitivity() launches our Main Activity.
6. onView() is used to select a view for testing and withId() is used to locate the UI element and rest is used to check whether the particular element is displayed or not.

Running Test Case –

        • For Android Studio Version Less than 2.1
          • Click on Build Variants
      • Select Android Instrumentation Tests
      • Right click on class name and click on Run
      • For Android Studio Versions More than 2.1
        1. Right click on class name and click on Run


16
Jun

How to Configure TestNG in Android Studio ?

How to Configure TestNG in Android Studio?


In our previous tutorial, we have learnt about Junit Testing framework and now in this we will get to know about one more powerful testing framework called TestNG. TestNG framework as some different functionalities which makes it more powerful testing framework..

What is TestNG Framework?

TestNG is a testing framework developed from inspiration of Junit and Nunit with additional features making is more effective and simple for use. It is a powerful automation testing framework where NG Stands for Next Generation. It gives developers power to write more flexible and powerful test cases.

Features of TestNG –

  • It allows you to use new features of Java programming language while writing test cases.
  • Like Junit it provides annotations to identify your test methods and flow of execution.
  • Separates compile time test code and run time configurations.
  • Provides powerful test case execution support.
  • Allows you to perform multithreading testing.
  • Initially It was designed for unit testing but now allows load testing , parallel testing etc.

There is so much more in this and we will explore more and more when we start coding. But it is very important to learn basics about Testing frameworks before writing your test cases as selection of right framework is like building pillar for your automation framework.

How to Setup TestNG –

    • Create and Android Project or open your existing project


    • Go to app -> build.gradle


  • Copy the below line of code in your dependencies section.
     
  • Click on Sync
  • Once you get build successful message then you are ready to go.


15
Jun

How to Configure Junit Testing Framework in Android Studio

How to Configure Junit Testing Framework in Android Studio?


In our previous post, we talked about the Android Studio and Java Installation. In this we will learn about very famous unit testing framework setup for android studio that is Junit. Before jumping on to the setup let us learn more about Junit Testing Framework.

What is Junit ?

Junit is a widely used testing framework used for Java Programming language. Before you learn, how to write automated test cases it is very important to learn Junit testing framework in detail. It helps you to define the flow of your testing framework.
Junit is built on idea of “first testing and then coding” which helps in increasing productivity of the test case developer and stability of the code.


Features of Junit Testing –

  • It is open source testing framework allowing users to write and run test cases effectively.
  • Provides various types of annotations to identify test methods.
  • Provides different types of Assertions to verify the results of test case execution.
  • It also gives test runners for running tests effectively.
  • It is very simple and hence saves time.
  • It provides ways to organize your test cases in form of test suits
  •  You can integrate Junit with Eclipse, Android Studio, Intellij etc.

How to Setup JUnit–

    • Create a new Project in Android Studio – (Refer our previous post)
      • Go to app -> build.gradle
      • In the file add below line of code in dependencies section:
        • testCompile group: ‘junit’, name: ‘junit’, version: ‘4.12’


      • Click on SyncJunit
      • Once you get Build is Successful message then your Junit Framework is Set and you can use it while writing your test cases
      • Note – We will see how to use Junit in your test cases in our future posts


14
Jun

How to install Android Studio?

How to install Android Studio?


A Manual tester want to start and learn automation, there are many curiosity come to their mind about what tool to use?, which IDE(Integrated Development Environment) to select?, what testing framework to select? This tutorial will help you to know about an IDE called Android Studio. IDE is nothing but development environment for writing and executing code.
Android Studio is the official IDE for coding android app, but it is also very good alternative for writing and executing test cases. Android Studio is very easy to install and faster to write, deploy and run.


Let us see why Android Studio is best suitable for testing

  • Android Studio supports both JUnit and TestNG testing framework which are most commonly used for building automation framework.
  • We can use various automation tool with Android Studio like Appium, Espresso and Robotium etc.
  • Android Studio provides support for Unit Testing (White box testing) and Instrumentation Testing (Black box testing).
  • After Test case execution, Android Studio generates html report as an overview of passed and failed test cases.
  • Most interesting feature provided by Android Studio is we can calculate code coverage on the basis of test cases written. This helps us measure our testing efforts.

After knowing, how we can effectively use Android Studio for our testing effort. Now, we will see how to install Android Studio. Before installing Android Studio, it is required to install Java.

      • First of all Download latest JDK version from This Link
      • Click on “Accept License Agreement” and download latest code.
      • Click on .exe file and then java installation window will open.
      • Click on next and finish installation.
      • Installation doesn’t complete unless you set JAVA_HOME.
      • So go to my computer properties.
      • Click on Advanced System Settings -> Advanced > Environment Variables
      • Click on New under System Variable. Then in Variable Name enter “JAVA_HOME” and Variable Value as “Java Installed Path” (It mostly lies in : C:\Program Files\Java\jdk1.8***)
      • Now, edit path variable and add “;%JAVA_HOME%\bin” at the end.
      • To verify that java is installed successfully, go to command prompt and enter “java – version”. You will see “Java Version 1.8.***
    • Now Download Android Studio from THIS LINK
    • Click on .exe and install the Android SDK into your system.
    • Installation doesn’t complete unless you set ANDROID_HOME. So go to my computer properties.
    • Click on Advanced System Settings -> Advanced -> Environment Variables -> New Variable and Variable Name – “ANDROID_HOME” and variable value-” C:\Users A\Downloads\android-sdk . The same way as we did for Java Home
    • Then, Select Path Variable -> Edit and then add following path after semicolon (;) %ANDROID_HOME%/tools;%ANDROID_HOME%/platform-tools


13
Jun

Difference between unit tests and instrumentation tests

Difference Between Unit Tests and Instrumentation Tests


 Android Studio allows you to write unit test as well as instrumentation tests. It is very important for us to learn more about unit tests and instrumentation tests. We have defined it in terms of Android Application.

In layman terms, Unit tests are the test cases written for testing code written by developers and Instrumentation test are the test cases written for testing UI & functionality of the application. In short, Unit tests is associated with white box testing and instrumentation tests is associated with black box testing.

Unit Tests –

  • Unit tests runs in local JVM and minimizes the execution time.
  • Unit Tests cannot test UI of the app without mocking activity objects.
  • Unit test are used for white box testing for testing code.
  • Most of the time Unit Tests are written by Developers.
  • You don’t need a device connected for execution of Unit Tests.

Instrumentation Tests –

  • Instrumentation tests are used for black box testing.
  • It is used to test GUI of the application along with its functionality in real environment.
  • For execution of Instrumentation tests you need a device /emulator on which the application is first installed and then tests are executed.
  • Automation Testers are involved in writing instrumentation framework.


11
Jun

Basics of Android Project Structure

Basics of Android Project Structure


Coding with android studio looks very promising because it is an IDE based on IntelliJ IDEA that is used for android application development. Even though we are not going to build android application , it is very important for us to understand the project structure so that we can code effective and understandable automation test framework.

There are five important components of Android Project Structure like main,gradle,.idea, app and External Libraries. Let us Discuss this in detail.

  • Main Project –This would be entire project context. Whatever you do in IntelliJ IDEA, you do that in the context of a project. A project is an organizational unit that represents a complete software solution. A project in Android Studio is like a workspace . In android Studio a project, can contain multiple modules. This means that, in theory it is possible to build multiple apps within the same project.
  • .idea –.idea is used for storing project specific metadata in Android Studio.
  • Project Module –This is the actual project folder where your application code resides. The application folder has following sub directories
    • build: This has all the complete output of the make process i.e. classes.dex, compiled classes and resources, etc.
    • libs : The lib folder is used for storing project specific jar files..
    • src: The src folder can have both application code and android unit test script. You will find two folders named “androidTest” and “main” correspond to src folder. The main folder contains two subfolders java and res. The java folder contains all the java codes and res contains drawables, layouts, etc.
  • Gradle – Gradle is used for configuration of build procress. We will see more detais about this in our nest post.
  • External Libraries -This is a place where Referenced Libraries and information on targeted platform SDK is shown.
10
Jun

Top 25 HP LoadRunner Interview Questions and Answers

Top 25 HP LoadRunner Interview Questions and Answers


Q1. What is the difference between risk and failure?

Risk is potential problem that has not yet occurred but is likely to happen and that may cause the failure of the software product.
Failure for the end user is deviation of the component or system from its expected delivery or expected product.

Q2. What are different components of Load Runner tool?

Load runner has following components:

Vugen: Vugen is used to create the automated performance scripts.
Controller: It is used to organize, drive, manage and monitors the load tests.
Analysis: It helps us to view and compare the test results.
Load Generators (LG): It is the component which is responsible to generate and run the Vusers to put load on the system.

Q3. What is correlation and how do you find it?

Correlation is used to find out the data which is unique for every run such as session ids, or unique ids which change every time we perform the step. They can be found out by comparing the same scripts manually or automatically in Load runner

Q4. How many sections are there in load runner vugen?


There are basically 3 sections:

  • Vuser_init: At this section, the starting transactions such as login etc is defined.
  • Action: this lists all the actions performed.
  • Vuser_end: at this section, we define the logout or closing functions.

Q5. How many logging options are available in load runner and when do we use them?

    • Standard Log Option: When you select Standard log, it creates a standard log of functions and messages sent during script execution which can be used for debugging. Disable this option for large load testing scenarios. When you copy a script to a scenario, logging is automatically disabled.
    • Extended Log Option: Select extended log to create an extended log, including warnings and other messages. Disable this option for large load testing scenarios. When you copy a script to a scenario, logging is automatically disabled. We can specify which additional information should be added to the extended log using the extended log options.

Q6. What do you mean by scenario in load runner?


A scenario defines the events that occur during each testing session. For example, a scenario defines and controls the number of users to emulate, the actions to be performed, and the machines on which the virtual users run their emulations.

Q7. How you can capture the dynamic value in load runner, explain the function used?


We can capture the dynamic value by “web_reg_save_param” function. The syntax for the function is “web_reg_save_param (“ID1Value”, “LB= value=\””, “RB=\””, “Ord=1”, LAST);” if you specify ORD= ALL it will takes all the values and form an array

Q8. What does lr_abort function do in HP Load Runner?


It aborts the execution of script and end the execution if any error occurs. For this we need to uncheck continue on error in runtime settings.

Q9. Have you ever handled a “captcha”? What are the challenges you faced?


Captcha can’t be detected by load runner so in need to handle that we can ask the dev to disable the functionality or to make it static value. Another way is to send the captcha value in response so that we can correlate it.

Q10. What is the use of “lr_paramarr_random” function and where we use it?


This is used to pass random values in any code where the values are captured by ordinal all function.

Q11. What is the extension of scenario file in load runner?

It is saved as .lrs.

Q12. How many check points are available in LoadRunner?

We have mainly 2 check points:

  • Image Check
  • Text Check

Q13. How to create monitor in Load Runner?

  • On My Performance Center navigation bar, select Resources > Test Resources.
  • Click New Monitor Profile. The Create New Monitor Profile dialog box enables you to add a new monitor profile.
  • In the Monitor Profile page, click Add Monitor button. Select monitor in Add New Monitor page.
  • In the Edit Monitor dialog box, enter the required information and select the counters that you want to monitor. The Edit Monitor page varies depending on monitor type you select.

Q14. What is the difference between HTML and URL based recording in LoadRunner?


HTML level will generate a web_submit_form statement that only records options an end user is allowed to see and change.
URL level will generate a web_submit_data statement that records all data that was actually sent from the browser to the server.

Q15. What is 90% in Load Runner report?

If you arrange 100 response times from good to bad i.e. in ascending order. The 90 percentile response time is the 90th response time. So, if 90th response time is in the acceptable range, we can say 90 out of 100 response times are in the acceptable range. Other 10 might be in the acceptable range or may not.

Q16. If a page has 5 products and you have 5 virtual users, how will you perform click on one product??

We can parameterize 5 links with sequential iteration, So that each virtual user picks one link sequentially and executes it.

Q17. What is goal oriented scenario? What goals can be achieved through it?

Load Runner provides you with five different types of goals in a goal oriented scenario:

  • Number of Virtual Users
  • Hits per second
  • Transactions per second
  • Pages per minute
  • Transaction response time

Q18. Tell any default monitoring tool which comes with windows?


“Perfmon” is a default monitoring tool which is inbuilt in all windows system which can be called by typing “perfmon” in run.

Q19. Where do you set automatic correlation options?

Automatic correlation from web point of view can be set in recording options and in correlation tab. We can enable correlation for the entire script and choose either online messages or offline actions where we can define rules for that correlation.

Q20. Have you worked on user defined functions in LoadRunner? How can we create them?

Before we create the User Defined functions, we need to create the external library (DLL) with the function. We add this library to VuGen bin directory. Once the library is added, we assign user defined function as a parameter. The function should have the following format: __declspec (dllexport) char* (char*, char*)\.

Q21. How can you debug a Load Runner script?

VuGen contains two options to debug Vuser scripts:

  • Run Step by Step command.
  • Putting breakpoints in a script.

We can also manually set the message class within the script using the lr_set_debug_message function.

Q22. What changes can you make in run time settings of Load Runner?

There are four run-time settings that can be done:

  • Log: Logging can be set to standard or disabled.
  • Pacing: This contains iteration count.
 

Q23. Name different selection methods while selecting data from a file in Load Runner?

It can be done in 4 ways:

  • Sequential
  • Random
  • Unique
  • Parameter Name.

Q24. How can we find out database issues in our application?


Data resource graphs and monitors can be used to determine any such issue in database. In LoadRunner, we can specify the resource which needs to be measured before the controller runs.

Q25. What type of graphs available in Load Runner?


There are following types of graphs:

  • Network delay time graph
  • Transaction response time graphs
  • Hits/second graph
  • Pages download/second Graph.


9
Jun

Top 25 Performance Testing Interview Questions and Answers

Top 25 Performance Testing Interview Questions and Answers


Q1. What is Performance testing?

Performance testing is a discipline where we test our system to evaluate the system performance when subjected to virtual user load.

Q2. How is Load Testing different from Stress Testing?

Load Testing: It is the simplest form of testing which is done by increasing load step by step to reach the defined limit or goal.
Stress Testing: We can also call it as negative testing as we test the system beyond its capacity to find out the break point of the system.

Q3. What is concurrent user load in performance testing?

Concurrent user load can be defined as when multiple users hit to any functionality or transaction at the same time.

Q4. What is a protocol and how many you have worked on?

A protocol is a set of rules for information communication between 2 or more systems. There are many protocols such as Http/Https, FTP, Web Services, Citrix.Mostly used protocols are Http/Https and Web Services.

Q5. How can you check the system for memory leaks?

We can identify the memory leaks by running load tests for a longer durations and analyzing the ram of the system, generally it will grow with time and will lead to deadlocks and breakpoints.

Q6. Can you tell a scenario where throughput is increasing with response time means when they are directly proportional?

Yes it can be possible when you have lots of CSS (Cascading Style Sheet) in your application which takes a lot of time to display. We can expect this type of situation where throughput will be increasing as well as the response time.

Q7. What is Think Time?


Think time can be defined as the real time wait between 2 consecutive transactions. For Example a real time user waits to evaluate the data he received before performing the next step, that wait time he takes can be stated as think time.

Q8. How do you find out the performance bottlenecks?


Performance Bottlenecks can be identified by using different counters such as response time, throughput, hits/sec, network delay graph. We can analyze them and tell where the suspected performance bottleneck is.

Q9. How you can calculate pacing for your application?

We can calculate pacing by the formula as
No. of users = (Response Time in seconds + Pacing in seconds) * TPS
TPS is transaction per Second.

Q10. What is Ramp-Up and Ramp-Down?

The rate at which we increase the load on system by adding virtual users is called ramp up.
The rate at which virtual users exit from system is called as ramp down.

Q11. What is performance engineering, how its different form performance testing?

Performance testing is the process where we identify the issues in the system.
Performance engineering is the process where we address the issues and rectify them.

Q12. How do you do the analysis of the system for identifying issues?

We can study the various graphs generated by the tool such as Response time, throughput graph, running Vusers graph etc. and also we can see the server logs to identify the issues in system.

Q13. Have you worked on some analysis tools, if yes explain?

Yes, there are many tools available for analysis such as Dynatrace, Cawily. We can use these tools to see the exact transactions and queries running on the AUT to identify the root cause of any issue or failure.

Q14. What is IP spoofing and why is it used?

IP spoofing is used to spoof the system so that each host machine can use many different IPs to create hypothetical environment where system believes that request are coming from different locations.

Q15. List down any challenge you faced in your performance career and how did you overcome it?

Yes, I faced many challenges like defining the scope of application, break points which I over came by studying the historical data of application and based on them I decided the values, setting up the performance environment including proxy bypassing, connecting to Server under test.

Q16. What can be key factors in deciding whether we need a performance testing for any application before going live?

We can decide based on following factors:

  • How many are the target users?
  • How much application will grow with period of time?
  • Who all are competitors and how much traffic they general get?
  • How many critical scenarios we have?
  • How much will be the business loss if site is unavailable?

Q17 . Have you ever seen “No Data available for current settings”? When do we get this?

Yes, this comes when you do not have enough data in your data pool. So, we need to make sure that we have created the data pool as per the settings of conductor.

Q18. What is difference between Scalability testing and Load testing?

Load testing is done to see the application behaviour under defined load.
Scalability testing is done beyond the defined load to see how scalable your application is and find out the breakpoint.

Q19. What is difference between Simultaneous user and Concurrent user?

Simultaneous users wait for other user to complete then it starts its activity whereas in concurrent users, it can be like 2 users log into the system and perform different activities at the same time.

Q20. How to find bottlenecks and resolve them?

We first need to analyze all the counters like Memory Leaks, Avg. Time taken, Concurrent user load, throughput etc. Based on the analysis results, we will find out where bottleneck could occur. Then parameters need to be fine-tuned in DB2 Server like Queries, Stored Procedures, PL/SQL, Indexes, Locks, No of open connections etc.

Q21. What best practice you will follow if asked for setting up a performance bed?

  • We need to get the clear understanding of the architecture of system under test.
  • Have to setup the best possible replica of production aka stage.
  • Understand the usage growth of application as well as under different time zones
  • Identifying the critical flows of application.

Q22. What is performance tuning? How many types are there?

Performance tuning is done for improving the system performance:

  • Hardware Tuning: Optimizing, adding or replacing hardware components of the system and changes done in the infrastructure level to improve system performance is called hardware tuning.
  • Software Tuning: Identifying the software level bottlenecks by profiling the code, database etc. Fine tuning or modifying the software to fix the bottlenecks is called software tuning.

Q23. What are the key counters you monitor during a load test?

They can be transaction response time, memory usage, disk space, and CPU time.

Q24. What is the difference between Overlay graph and Correlate graph?

Overlay Graph: It overlay the content of two graphs that shares a common x-axis. Left Y-axis on the merged graph show the current graph value & Right Y-axis show the value of Y-axis of the graph that was merged.
Correlate Graph: Plot Y-axis of two graphs against each other. The active graph Y-axis becomes X-axis of merged graph. Y-axis of the graph that was merged becomes merged graph Y-axis.

Q25. What is the difference between hits/sec and req/sec?

  • Hits per second means the number of hits the server receives in one second from the vuser.
  • Request per second is the number of request vuser will receive from the server


19
May

Linux Inode

Linux Inode


What is Inode?

Inode is abbreviated as Index Node. As we know in Linux, whatever is there is a file. So, in order to maintain a consistency by treating everything as a file (even the hardware devices). The monitor, hard disk, printer, mouse, keyboard or directories are also treated as files in Linux. The regular files contain data such as text files, music files (mp3, mp4, audio etc.), video (multimedia files ) etc. Keeping aside the regular data, there is some other data about these files such as their size, ownership, permissions, time stamp etc. This meta data about a file is managed with a data structure known as Inode.

Where is Inode stored?

In Linux, file is stored in two different parts of a disk – the data blocks and the Inodes. The data block contains contents of a file. All other information about the file is stored in Inode.

Example1 : Rename a directory dir1 to Directory_1 which is in your current path

Syntax:

Kindly note that Inode number of dir1 will be same as Directory_1. In order to view properties of a directory, use ls –d  command.

Example2 : Prompt for confirmation before overwriting Examine.txt in /tmp directory

Syntax:

This is used while we are taking a backup so that updated file is stored and kept for use.

The input required during the prompted confirmation is:

  • For yes : YES, Y, yes, y
  • For no : NO, N, no, n

When the destination file permission is different than source file, mv –i  command will display the confirmation in following way:

Example3 :Move multiple files in specific directory. ( Let’s say  we have Linux_Lect1, Linux_lect2 and we need to move it to Linux_tuts directory). We have both Linux_lect1, Linux_lect2 in my current path:

Syntax:

Example4 : Take a backup of Destination file “Examine“ before overwriting a file:

Using a mv command  with – – suffix  option we can take a backup of destination file before overwriting .  The destination file will be moved with the specified extension:

–S

or

–suffix option.

Syntax:

Backup for Examine file is taken and changed to Examine.doc

Example5 : Suppose there are 10 files in directory d1 and we have copied any 8 files in directory d2. Now, we need to copy rest of the 2 files in directory d2.

Syntax:

-u option will perform update only if the source is newer than destination file


16
May

Linux ECHO Command

Linux ECHO Command


Usage of Linux ECHO Command:

This command is very important command widely used in bash and c shells. It is used to display a line of text/string on standard output or a console.

Syntax:

Example1 : Input a line “Hi, this is my session 2” and display on standard output.

pic1

Example2 : Declare a variable x and assign its value let’s say 30. Then, echo its value i.e. print value of x.

pic2

Example3 : Print statement “ I Love Linux” with no space using echo.

Explanation: Usage of \b as backslash interpreter.

pic4

Example4 : Print all words of a string keeping one word in each line. Lets take string as “I Love Linux”.

Explanation: \n is used as next line interpreter.

pic5

Example5 : Print all files and folder in current path using echo command (an alternative of ls command).


16
May

Linux CP Command

Linux CP Command


Usage of Linux cp Command:

This command is used to copy one or more files from source path to destination path.

Syntax:

Example1 : Make a copy of file into same directory.

Explanation:

  • Creates a copy of “originalfile” in present working directory. The copied file will be named as “newfile”.
  • Be very cautious while running the above command. If in case any file named as “newfile” exists in the same directory, it will be overwritten without confirmation prompt. This is the default behavior of cp command.
  • If you want to be prompted while overwriting a file, use interactive option (i). For example : # cp –i originalfile newfile. If “newfile “  exists , you will be prompted as:

    • cp : overwrite ‘newfile’?
  • If you type any of the combination (y,Y,yes,YES), the newfile will be overwritten and if you type any of the combination (n,N,no,NO), the newfile will not be overwritten, i.e. command will be nullified.


Example2 :Copy a file named as originalfile to another location say (/home/root). 


Or

Both syntax are same. The forward slash-dot (/.) is implied in second command (the dot is very special in every Linux directory which means  “this directory”).

Suppose originalfile is at following path: /home/root/folder1/contentfile. Then, above syntax will be written as:

Example3 : Copy a file named as originalfile to another location say (/home/root) with a new name testFile.

Example4 : Copy all files starting with word “testing” from home directory of user “root” to home directory of user “govind”.

Note : Asterisk (*) is a wildcard or special character which expands to match other characters.

Example5 : Copy all files from the home directory of root to home directory of user ram.

Example6 : See what cp command is doing.

Example7 : Create backup date of each copied file.

If destination folder already have a file and we know that by using cp command, it will overwrite the same in destination directory. So, we use – backup option , cp command will make a backup of each existing file.

–backup=simple option will create a backup file which will be marked by a tilde sign(~) at the end of file. —backup option has following control options:

  • none, off: no backup will be created (even if –backup is given)
  • number, t : make numbered backup
  • existing, nil : numbered if numbered backup exist, simple otherwise.
  • simple, never: always make simple backups.
Assignment

Few questions with their answers are present in assignment section for this command.


15
May

Linux LS Command

Linux LS Command


Usage of Linux LS Command:

This command is used to get list of files & folder at a particular path. Suppose there is a folder containing files and you want to know what all files are there in that folder we use this command. We use certain switches to get desired output.

Syntax:

Example1 : List all files in a folder.

pic1

Example2 : Show all the files of a directory, size, modified date and time, file and folder name and owner of file and its permission.

pic2

Example3 : View all hidden files in the folder.

pic3

Example4 : Know all files and directories in a current folder.

pic4

All files which are followed by / are directories and rest are files.

Example5 : List all files in reverse order.

pic5

Example6 : To print all files in reverse order.

pic6

Example7 : Sort the files by files size.

pic7

Example8 : List your home directory.

Example9 : List the home directory of user “Aman”.


14
May

Linux SU Command

Linux SU Command


Usage of Linux SU Command:

This command is used to become another user in his own session. By default, user without username will login as super-user (i.e. Root).

Syntax:

Example1 : Login as “guest “user.

Example2 : Run specific command with another user privilege say govind.

-c option is used to return back to the command line of former user after execution is completed.

Example3 : Login as root user.

Or

Note: In Linux while giving password it won’t be visible because of security reason.


10
May

Linux Introduction

Linux Introduction


Some historical fact for Linux:

In 1991, in Helsinki, Linus Torvalds began a project that later became the Linux kernel. He wrote the program specifically for the hardware as he wanted to use the functions of his new PC with an 80386 processor.

What is Linux?

Linux is an Operating System.

What is Operating System?

Low level software that supports a computer’s primitive function such as scheduling tasks and controlling peripherals.

Types of Operating System:

  1. System Software: System software are those software which incorporate the programs that are dedicated to manage the computer itself, such as the operating system, file management utilities, and disk operating system.For instance : Linux , Windows etc
  1. Application Software: Application software or simply applications, are often called productivity programs or end-user programs because they enable the user to complete. Specific examples of application software incorporate Microsoft Office, Excel and Outlook, Google Chrome, Mozilla Firefox and Skype.
  1. Utilized Software: Utilized Software or a business application is any software or set of computer programs used by business users to perform variety of business functions.  For instance: Antivirus, McAfee etc.

Finally we conclude: Linux is Open Source Operating System. Specifically Linux is System Software providing an interface between user and computer.

Advantages of Linux:

  • Linux is very durable.
  • Linux is less susceptible to computer malware.
  • Linux as compared to other OS is fast and does not slow down over time.
  • Old desktop/Laptops can be given new life using Linux OS
  • Linux has variety of distributors so we have many varieties in Linux.
  • Because there are many distributors you can freely access this software.
  • It’s a superior method of upgrading software

Disadvantages of Linux:

  • Many windows programs will not run in Linux thus requires a change.
  • There is a smaller selection of peripheral hardware drivers for Linux.
  • People who are new to Linux requires to learn this skill thoroughly in order to use the Operating System.

Features of Linux OS:

  • There are two prompts in Linux
    • $ -> Local user prompt
    • # -> Admin user prompt or Root Prompt
  • Commands are followed by switches but it does not matter in which order we are using switch.
    Example: ls –lrt is same as ls –rtl same as ls -l -r -t
  • Linux is case sensitive so using upper case will give different output and lower case different.
  • Linux is Open source operating system.
  • Several program are running at same time.
  • Several users on same machine at same time

Wild characters in Linux

S. No. Wild Characters Description
1 * Asterisk find any number of characters in a filename, including none.
2 ? Question mark find any single character.
3 [] Square brackets enclose a set of characters, any one of which may match single character at that position.
4 Hyphen used within [ ] denotes a range of characters
5 ~ Tilde at the beginning of a word expands to the name of home directory.


9
May

Linux Tutorial


Linux Tutorial


In this free Linux Tutorial, we will cover most important topics of Linux in a short, crisp and concise manner. Tutorial sections will have Linux Commands with examples and brief of each command how it works. This tutorial will cover Linux Beginner Level to Linux Advanced Level. In case, you are good in Linux and want to assess your knowledge. You should solve the Linux Assignments present and take the Linux Quiz to see where you stand. 

Pre-Requisites

To learn this tutorial, you don’t require any previous knowledge of this domain. Having knowledge in this domain is an added advantage.

Audience

Anyone who wants to gain extra knowledge of Linux Operating System and Linux Commands. This course can take up by students, geeks, Linux developers, testers, administrator. After completing this tutorial, you will find yourself ready to browse Linux Operating System, to answer Linux Interview Questions and to explore more around Linux.


20
Feb

Writing Effective Business Emails

In this post of Writing Effective Business Emails, we will be covering following:

Addressing:

  • Limit to who really needs to know.
  • Make it clear in text who has action and who is info addressee.
  • Use BCC to protect Email addresses unless everyone knows each other.
  • Watch Reply All.
  • Use address book & validate often.
    • Avoid typing addresses free hand; many addresses are similar; watch auto fill.
    • Send same message to multiple recipients by editing message as new or cutting and pasting.
  • Make sure forward does not embarrass sender.
    • Get permission if in doubt.
    • Never “disrespect” sender in forward or reply.
  • Fill in addresses last to avoid sending an incomplete Email by mistake.

Subject Line:

  • Headline (think newspaper).
  • Grab Attention.
  • Summarize message.
  • Make it easy for recipients to triage your Email and find it later.
  • Don’t “Reply All” to a message to grab addressees without changing subject.

Opening Lines:

  • With reference to your letter of 8 June, I …
  • I am writing to enquire about …
  • After having seen your advertisement in … , I would like …
  • After having received your address from … ,I …
  • Could you please help me with the following…..
  • This is to inform you that…..

Closing Lines:

  • If you require any further information, feel free to contact me.
  • Please let me know in case any other information is required.
  • I look forward to your reply.
  • I look forward to hearing from you.
  • I look forward to seeing you.
  • Please advise as necessary.

Message Text:

  • Keep the message focused and readable.
  • Keep it short.
  • Break into paragraphs; skip lines between.
  • Use short sentences.
  • Use plain text editor, not MS Word.
  • Avoid HTML.
  • Avoid fancy typefaces.
  • Write in standard professional English with Capitalization and correct spelling.
    • Don’t try to impress.
    • Avoid chat speak, e.g., gr8 & emoticons, J.
  • Don’t type in All Caps
  • Avoid !!!
    • Avoid using URGENT and IMPORTANT.
  • Use * * to highlight text if you need.
  • Proofread & Spell check.
  • Quote back selectively when replying to long messages.
    • “Yes, I agree.” is useless without context.
    • Top quote vs. bottom quote – no consensus.
    • Avoid “Fisking,” replying line by line in an argumentative manner.
  • For URL links, use Outlook inbuilt function to shorten long URLs or enclose in < >.
  • Identify yourself clearly to new contacts.
    • Hello, I am… The reason I am writing…
    • Hello, so-in-so suggested I contact you…
  • Respond Promptly.
    • Apologize if you aren’t able to reply promptly.
    • Interim reply when too busy.

Attachments:

  • Cut and paste relevant parts of attachment into text of Email.
  • Upload attachments to shared location / sharepoint and use URL links.
  • Recipients who do not know you, may be reluctant to open attachments or click URLs.
  • Ensure you insert attachment to avoid sending emails like “Oops, here’s the attachment.”
  • Post large attachments in a blog (if any) and then send an Email announcement.

Signature Line:

  • Include (For receivers information)
    • Your name
    • Title
    • Organization
    • Email address
    • Website / Blog
    • Phones
  • Can be shortened for frequent correspondents.

Confidentiality and Security:

  • Have a separate Email account for newsletters, announcements etc.
  • Delete browser history, cache, cookies, userids and passwords after using a public Internet connection.
  • Logout and close all Apps after using a public Internet connection. (Restart if possible.)
  • Don’t open company emails on non-secure personal computer.
  • Back up your Email.
  • Beware of spam.
  • Beware of Phishing attacks.
  • Never include personal or financial info in an Email.
  • Don’t unsubscribe from anything, you did not subscribe to.
  • Beware of friend’s Emails.

Using Outlook:

  • Organize Email into folders.
  • Keep a copy of all sent Emails.
  • Review and clean out folders periodically.
  • Don’t print Emails unless its important.
  • Use “out of office” status when away.

10 common Email habits that waste time and cause problems:

  • Vague or nonexistent subject line.
  • Changed the topic without changing the subject.
  • Including multiple subjects in one note.
  • Sending before thinking.
  • Inadvertent replying to all.
  • Omitting the context of a reply.
  • Misaddressed recipients.
  • Displaying addresses of recipients who are strangers to each other.
  • Replying vs. forwarding.

Points to Remember:

  • Write a meaningful subject line.
  • Keep the message focused.
  • Avoid attachments.
  • Identify yourself clearly.
  • Be kind — don’t flame.
  • Don’t assume privacy.
  • Distinguish between formal and informal situations.
  • Respond Promptly.
  • Show Respect and Restraint.

Latest Posts

17
Feb

Defect Life Cycle

Defect Life Cycle which is also called as Bug Life Cycle. Below is what we cover in this post:
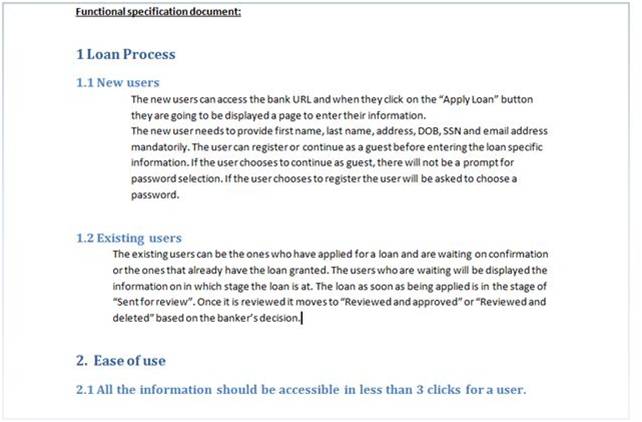
Defect Life Cycle

Defect Life Cycle

Defect Status Explanation:

New:

When the bug is posted for the first time, its state will be “NEW”. This means that the bug is not yet approved.

Open:

After a tester has posted a bug, the lead of the tester approves that the bug is genuine and he changes the state as “OPEN”.

Assign:

Once the lead changes the state as “OPEN”, he assigns the bug to corresponding developer or developer team. The state of the bug now is changed to “ASSIGN”.

Test:

Once the developer fixes the bug, he has to assign the bug to the testing team for next round of testing. Before he releases the software with bug fixed, he changes the state of bug to “TEST”. It specifies that the bug has been fixed and is released to testing team.

Deferred:

The bug, changed to deferred state means the bug is expected to be fixed in next releases. The reasons for changing the bug to this state have many factors. Some of them are priority of the bug may be low, lack of time for the release or the bug may not have major effect on the software.

Rejected:

If the developer feels that the bug is not genuine, he rejects the bug. Then the state of the bug is changed to “REJECTED”.

Duplicate:

If the bug is repeated twice or the two bugs mention the same concept of the bug, then one bug status is changed to “DUPLICATE”.

Verified:

Once the bug is fixed and the status is changed to “TEST”, the tester tests the bug. If the bug is not present in the software, he approves that the bug is fixed and changes the status to “VERIFIED”.

Reopened:

If the bug still exists even after the bug is fixed by the developer, the tester changes the status to “REOPENED”. The bug traverses the life cycle once again.

Closed:

Once the bug is fixed, it is tested by the tester. If the tester feels that the bug no longer exists in the software, he changes the status of the bug to “CLOSED”. This state means that the bug is fixed, tested and approved.

Different Flows of Defect:

  • New — > Opened — > Fixed — >Closed
  • New — > Opened — > Rejected — >Closed
  • New — > Opened — > Fixed — >Re-opened — > Fixed –> Closed
  • New — > Opened — > Deferred
  • New — > Opened — > Rejected– >Re-opened — > Fixed –> Closed

Defect Life Cycle Implementation Guidelines:

  • Make sure the entire team understands what each defect status exactly means. Also, make sure the defect life cycle is documented.
  • Ensure that each individual clearly understands his/her responsibility as regards to each defect.
  • If a defect tracking tool (i.e. JIRA, Rational Clear Quest, Bugzilla etc ) is being used, avoid entertaining any ‘defect related requests’ without an appropriate change in the status of the defect in the tool. Do not let anybody take shortcuts, else you will never be able to get up-to-date defect metrics for analysis.

Latest Posts


15
Feb

Defect Priority & Severity

In this article, we will be covering following:

Defect Priority & Severity:

Priority:

—  Importance of the bug is known as Priority/Urgency to fix a fault.

Severity:

—  Impact of the bug is known as Severity /Impact of a failure caused by  this fault.

Defect Severity Levels:

Critical / Show Stopper

— An item that prevents further testing of the product or function under test can be classified as Critical bug. No workaround is possible for such bugs. Examples of this include a missing menu option or security permission required to access a function under test.

Major / High

— A defect that does not function as expected/designed or cause other functionality to fail to meet requirements can be classified as Major Bug. The workaround can be provided for such bugs. Examples of this include inaccurate calculations; the wrong field being updated, etc.

Average / Medium

— The defects which do not conform to standards and conventions can be classified as Medium Bugs. Easy workarounds exists to achieve functionality objectives. Examples include matching visual and text links which lead to different end points.

Minor / Low

— Cosmetic defects which does not affect the functionality of the system can be classified as Minor Bugs.

Defect Priority Levels:

Low

— The defect is an irritant which should be repaired, but repair can be deferred until after more serious defect have been fixed.

Medium

— The defect should be resolved in the normal course of development activities. It can wait until a new build or version is created.

High

— The defect must be resolved as soon as possible because the defect is affecting the application or the product severely. The system cannot be used until the  repair has been done.

Priority and Severity Examples:

High Priority & High Severity:

— An error which occurs on the basic functionality of the application and will not allow the user to use the system. (Eg. A site maintaining the student details, on saving record, if it doesn’t allow to save the record then this is high priority and high severity bug.)

High Priority & Low Severity: 

— The spelling mistakes that happens on the cover page or heading or title of an application.

High Severity & Low Priority: 

— If  there is an application that crashes after multiple use of any functionality (example–save Button use 200 times then that application will crash). Means High Severity because application crashed but Low Priority because no need to debug right now you can debug it after some days.

Latest Posts

13
Feb

Requirement Traceability Matrix – RTM

In this article, we will be covering following:

What is Requirement Traceability Matrix (RTM)?

  • RTM is a document that links requirements throughout the process of validation .
  • It is to ensure that all requirements defined for a software are tested.
  • It is a tool for the validation team to make sure that requirements are met during the validation of a software.
  • Matrix is created at the beginning of project on the basis of the project’s scope and deliverable’s.
  • It is bi-directional, as it tracks the requirement forward by examining the output of deliverable’s & backward by looking at the business requirement that was specified for a particular feature of the product.

Requirement Traceability Matrix – Parameters:

  • Requirement ID
  • Requirement Type (BRD and FSD)
  • Risk
  • Test Scenario ID
  • Test Case ID
  • Status
  • Defects ID


How to Create a Matrix?

Requirement Phase

QA Team start writing Test Scenarios & eventually Test Cases based on some input documents – Business Requirements Document (BRD), Functional Specification Document (FSD) and Technical Design Document (optional).

Ex:- BRD & FSD

BRD FSD
BRD

BRD

FSD

FSD

Design Phase

Based on the two input documents, below is the list of high-level scenarios to test:

TestScenarios_BRD

TestScenarios_BRD

For each Test Scenario, you are going to have at least 1 or more Test Cases. So, include another column and write the Test Case IDs as shows below:

BRD_TC

BRD_TC

At this stage, Traceability Matrix can be used to find gaps. For example, you see that there are no test cases written for FSD section 1.2 in the above Traceability Matrix.

As a general rule, any empty spaces in the Traceability Matrix are potential areas for investigation. So a gap like this can mean one of the two things:

  • The test team has somehow missed considering the “Existing user” functionality.
  • The “Existing user” functionality has been deferred to later or removed from the application’s functionality requirements.

If it is scenario 1, it will indicate the places where test team needs to work more to ensure 100% coverage. In scenario 2, TM not just show gaps it also points to incorrect documentation that needs immediate correction.

Execution Phase

Let us now expand the TM to include test case execution status and defects.

The below version of the Traceability Matrix is generally prepared during or after test execution:

BRD_Status

BRD_Status


Latest Posts