Handle Browser Notification using Selenium
First lets discuss what is browser notification?
Lot of websites have started sending notifications these days. You get these notification on desktop or device even when the concerned web page is not open in your browser. These are also called as Web push notifications. These notifications looks like below in firefox and chrome browser:

Browser Notification In Firefox
You can see this notification by visiting to jabong.com website.

Browser Notification In Chrome
You can see this notification by visiting to https://drupal-stage-web.weather.com website.
If we need to handle browser notification using Selenium in Firefox browser, we should use following code:
|
1 2 3 4 5 6 7 8 9 |
<span style="color: #000000;">public class Test { public static void main(String[] args) { System.setProperty("webdriver.gecko.driver","./Resource/geckodriver.exe"); FirefoxProfile ffprofile = new FirefoxProfile(); ffprofile.setPreference("dom.webnotifications.enabled", false); WebDriver driver = new FirefoxDriver(ffprofile); driver.get("https://jabong.com"); } }</span> |
While using this code, make sure gecko driver path is correctly configured. In case, you are not aware of Firefox Profile Class. Please visit below Selenium java doc to know more about its methods and usage.
http://seleniumhq.github.io/selenium/docs/api/java/index.html
If we need to handle browser notification using Selenium in Chrome browser, we should use following code:
|
1 2 3 4 5 6 7 8 9 10 11 |
<span style="color: #000000;">public class Test { public static void main(String[] args) { System.setProperty("webdriver.chrome.driver","./Resource/chromedriver.exe"); ChromeOptions options = new ChromeOptions(); options.addArguments("--disable-notifications"); WebDriver driver = new ChromeDriver(options); driver.get("https://drupal-stage-web.weather.com"); } }</span> |
While using this code, make sure chrome driver path is correctly configured. In case, you are not aware of Chrome Options Class. Please visit below Selenium java doc link provided above.
Do let us know if any issue is faced while handling browser/ web push notifications using selenium.
Python SQLAlchemy
Python SQLAlchemy and Object-Relational Mapping
Whenever it comes to programming a web service, you will require a solid database backend. In the past, programmers used to write raw SQL statements, pass them to the database engine and parse the returned results as a normal array of records. Nowadays, programmers can write Object-Relational Mapping (ORM) programs to remove the necessity of writing tedious and error-prone raw SQL statements.
WHAT IS ORM?
Most programming language platforms are object oriented. ORM is a programming technique for converting data between incompatible type systems in object-oriented programming languages. Data in RDBMS (Relational Database Management System) servers on the other hand is stored as tables. Object relation mapping is a technique of mapping object parameters to the underlying RDBMS table structure. An ORM API provides methods to perform create, read, update, delete (CRUD) operations without having to write raw SQL statements. So basically, an ORM takes care of these issues while you can focus on programming the logics of the system.
Installation:
In order to run the python script with SQLAlchemy codes in it, you need to install flask-sqlalchemy extension first for that run the command :
|
1 |
pip install flask-sqlalchemy |
Let’s Get To Know SQLAlchemy
For using functions from SQLAlchemy in your program, you need to import it first using the statement :
|
1 |
from flask_sqlalchemy import SQLAlchemy |
Now you can create your Flask application and make surem you set the URI for the database which is to be used in your program.
|
1 2 |
app = Flask(__name__) app.config['SQLALCHEMY_DATABASE_URI'] = 'sqlite:///persons.sqlite3' |
Now, you need to create an object of SQLAlchemy class with the application object provided as parameter. The object provides helper functions for ORM operations and also provides a Model class using which user-defined models for database is declared. In the following code snippet a persons model is created:
|
1 2 3 4 5 6 7 8 |
db = SQLAlchemy(app) class persons(db.Model): id = db.Column(db.Integer, primary_key = True) name = db.Column(db.String(100)) phone = db.Column(db.String(10)) def __init__(self, name, phone): self.name = name self.phone = phone |
To create or use the database that we specified in the URI run the create_all() method.
|
1 |
db.create_all() |
To add an object data to the database we can use the following code:
|
1 |
db.session.add(model object) |
For deleting just replace the add function with delete function and if you need to retrieve the records of the table use:
|
1 |
model.query.all() |
You can also apply filters while retrieving records. For eg:
|
1 |
model.query.filter_by(name = ‘abc’).all() |
will return the set of table rows whose city attribute is equal to ‘Mumbai’.
SAMPLE PROGRAM
Now, let’s see an entire program based on what we’ve learned so far:
First let’s setup an html page to display our database contents.
|
1 2 3 4 5 6 7 8 9 10 11 12 13 14 15 16 17 18 19 20 21 22 23 24 25 26 27 28 29 |
<!DOCTYPE html> <html lang = "en"> <head></head> <body> <h3> <a>SQLAlchemy TEST</a> </h3> <table> <thead> <tr> <th>Name</th> <th>Phone</th> </tr> </thead> <tbody> {% for person in persons %} <tr> <td>{{ person.name }}</td> <td>{{ person.phone }}</td> </tr> {% endfor %} </tbody> </table> </body> </html> |
We’ve set an HTML page with a heading SQLAlchemy Test and it has a table with two columns to display a persons name and phone number. Now we need to code a python script to do our job.
|
1 2 3 4 5 6 7 8 9 10 11 12 13 14 15 16 17 18 19 20 21 22 23 24 25 26 27 28 29 30 31 32 33 34 35 36 |
from flask import Flask, request, flash, url_for, redirect, render_template from flask_sqlalchemy import SQLAlchemy app = Flask(__name__) app.config['SQLALCHEMY_DATABASE_URI'] = 'sqlite:///persons.sqlite3' app.config['SECRET_KEY'] = "random string" db = SQLAlchemy(app) class persons (db.Model): id = db.Column(db.Integer, primary_key = True) name = db.Column(db.String(100)) phone = db.Column(db.String(10)) def __init__(self, name, phone): self.name = name self.phone = phone @app.route('/') def show_all(): person = persons("abc","9847068114") db.session.add(person) person = persons ("efg","9847068118") db.session.add(person) person = persons ("hijk","7012665458") db.session.add(person) person = persons ("lmno","7012898456") db.session.add(person) db.session.commit() return render_template('show_all.html', persons = persons.query.all() ) if __name__ == '__main__': db.create_all() app.run(debug = True) |
In the above python script, we create a model class for person which can hold values for a person’s name and phone number. We set the route of out app to the homepage of localhost. So after running the app, when you open the browser and visit your localhost homepage by typing 127.0.0.1:5000 in your browser’s address bar, you can see the html page we’ve setup. It will show all function finally returns the rendered template of show_all.html populated with the contents in the database.
Now, we can checkout how we add contents to the database. For that we need to create objects of our model class and provide values for its attributes i.e. name and phone of a person. Now we can add it to our database using SQLAlchemy_object.session.add(model object) function. After adding all the values make sure you commit the changes to the database in order to prevent data corruption. Now, we have our database ready with contents, we can display it on our html page using render template(‘html_file_name’, model = model.query.all()) function.
Save the python file and place the html file in a folder named templates. If no such folder exists create one. Now you can run the python script and visit 127.0.0.1:5000 in your browser to see your app running.
Benefits of SQLAlchemy:
According to http://pajhome.org.uk/blog/10_reasons_to_love_sqlalchemy.html here are the top 10 reasons to love SQLAlchemy
- Let’s you define the database schema in your code
- Automatically synchronise the model and schema
- Easy to read
- Simple queries.
- Seamless integration with web frameworks
- Fast loading, Better performance
- Transparent Polymorphism
- Works with legacy frameworks
- Easy to customise the library
- Great Documentation
Challenges of SQLAlchemy.
- The concept of unit of work is not very known among the developer community
- A heavy-weight API
Python Scrapy Library
What is Scrapy??
Scrapy is an open source and collaborative framework for extracting the data you need from websites in a fast, simple, yet extensible way.
But what do you mean be scraping data?
Web scraping is a computer software technique of extracting information from websites. This technique mostly focuses on the transformation of unstructured data (HTML format) on the web into structured data (database or spreadsheet).
In python, web scraping can be done using scrapy.
Let’s get started.
Installation first.
You can easily install using pip. For other installation option, click here. Type the following to your command prompt.
|
1 |
pip install scrapy |
Now, let’s get our hand on some coding.
Let’s start off by creating a scrapy project. Enter the directory of your choice and type in the following.
|
1 |
scrapy startproject tutorial |
Something like this prints out for you.
|
1 2 3 |
New Scrapy project 'tutorial', using template directory '/usr/local/lib/python2.7/dist-packages/scrapy/templates/project', created in: /home/enfa/Desktop/BS4/tutorial |
You can start your first spider with:
|
1 2 3 |
cd tutorial scrapy genspider example example.com |
This will create a directory tutorial with the following contents.
tutorial/
scrapy.cfg # deploy configuration file
tutorial/ # project’s Python module, you’ll import your code from here
__init__.py
items.py # project items definition file
pipelines.py # project pipelines file
settings.py # project settings file
spiders/ # a directory where you’ll later put your spiders
__init__.py
Now let’s create a spider, but what are spiders?
Spiders are classes that you define and that Scrapy uses to scrape information from a website (or a group of websites). They must have a subclass scrapy. Spider and define the initial requests to make, optionally how to follow links in the pages, and how to parse the downloaded page content to extract data.
We will be using examples from the official doc.
So save the following code in a file named quotes_spider.py under the tutorial/spiders directory in your project:
|
1 2 3 4 5 6 7 8 9 10 11 12 13 14 15 16 17 18 19 20 |
import scrapy class QuotesSpider(scrapy.Spider): name = "quotes" def start_requests(self): urls = [ 'http://quotes.toscrape.com/page/1/', 'http://quotes.toscrape.com/page/2/', ] for url in urls: yield scrapy.Request(url=url, callback=self.parse) def parse(self, response): page = response.url.split("/")[-2] filename = 'quotes-%s.html' % page with open(filename, 'wb') as f: f.write(response.body) self.log('Saved file %s' % filename) |
As you can see, our Spider subclasses scrapy.Spider
Let’s see wha teach of the attributes and methods mean.
- name: identifies the Spider. It must be unique within a project, that is, you can’t set the same name for different Spiders.
- start_requests(): must return an iterable of Requests (you can return a list of requests or write a generator function) which the Spider will begin to crawl from. Subsequent requests will be generated successively from these initial requests.
- parse(): a method that will be called to handle the response downloaded for each of the requests made. The response parameter is an instance of TextResponse that holds the page content and has further helpful methods to handle it.
The parse() method usually parses the response, extracting the scraped data as dicts and also finding new URLs to follow and creating new requests (Request) from them.
Now let’s run our spider.
Go to the top level directory and type in the following in your cmd.
|
1 |
scrapy crawl quotes |
This command runs the spider with name quotes that we’ve just added, that will send some requests for the quotes.toscrape.com domain. You will get an output similar to this:
… (omitted for brevity)
|
1 2 3 4 5 6 7 8 9 10 11 12 13 14 15 16 17 |
2017-7-1 21:24:05 [scrapy.core.engine] INFO: Spider opened 2017-7-1 21:24:05 [scrapy.extensions.logstats] INFO: Crawled 0 pages (at 0 pages/min), scraped 0 items (at 0 items/min) 2017-7-1 21:24:05 [scrapy.extensions.telnet] DEBUG: Telnet console listening on 127.0.0.1:6023 2017-7-1 21:24:05 [scrapy.core.engine] DEBUG: Crawled (404) <GET http://quotes.toscrape.com/robots.txt> (referer: None) 2017-7-1 21:24:05 [scrapy.core.engine] DEBUG: Crawled (200) <GET http://quotes.toscrape.com/page/1/> (referer: None) 2017-7-1 21:24:05 [scrapy.core.engine] DEBUG: Crawled (200) <GET http://quotes.toscrape.com/page/2/> (referer: None) 2017-7-1 21:24:05 [quotes] DEBUG: Saved file quotes-1.html 2017-7-1 21:24:05 [quotes] DEBUG: Saved file quotes-2.html 2017-7-1 21:24:05 [scrapy.core.engine] INFO: Closing spider (finished) |
…
Source:https://doc.scrapy.org/en/latest/intro/tutorial.html
Note:
Two new files have been created in the directory you were at. quotes-1.html and quotes-2.html, with the content for the respective URLs, as our parse method instructs.
Beautiful! Isn’t it?
Benefits of Scrapy:
- Scrapy is a full framework for web crawling which has the tools to manage every stage of a web crawl,
- Comparing with Beautiful Soup, you need to provide a specific url, and Beautiful Soup will help you get the data from that page. You can give Scrapy a start url, and it will go on, crawling and extracting data, without having to explicitly give it every single URL.
- It can crawl the contents of your webpage prior to extracting.”
Challenges of Scrapy:
- To parse just a few webpages, Scrapy is an overkill. Beautiful soup is better.
To learn to play with scrapy, check out
https://doc.scrapy.org/en/latest/intro/tutorial.html
www.tutorialspoint.com/scrapy/
Python Requests Library
What is Requests?
Requests is an elegant and simple Apache2 licensed HTTP library for Python. It is designed to be used by humans to interact with the language. This means you don’t have to manually add query strings to URLs, or form-encode your POST data.
Requests will allow you to send HTTP/1.1 requests using Python. With it, you can add content like headers, form data, multipart files, and parameters via simple Python libraries. It also allows you to access the response data of Python in the same way.
Installation:
Here, I am installing using pip. For more options, visit.
|
1 |
pip install requests |
Let’s get started.
First lets import requests
|
1 |
import requests |
Here, i am using a webpage within my server which open to a page like this.

Let’s create a Response Object r
|
1 |
r = requests.get('http://localhost/hello.php') |
Let’s check the current status of the site
|
1 2 3 |
r.status_code #200 |
|
1 2 3 |
r.status_code == requests.codes.ok #True |
|
1 2 3 |
requests.codes['temporary_redirect'] #307 |
|
1 2 3 |
requests.codes.teapot #418 |
Let’s get the content of the site
|
1 2 3 4 5 6 7 8 9 10 11 12 13 14 15 16 17 18 19 20 21 22 23 24 25 26 27 28 29 30 31 32 33 34 35 36 37 38 39 40 41 42 43 44 45 46 47 48 49 50 51 52 53 54 55 56 57 58 59 60 61 62 63 64 65 66 67 68 69 70 71 72 73 |
print r.text """ <!DOCTYPE HTML> <html> <head> <style> .error {color: #FF0000;} </style> </head> <body> <h2>PHP Form Validation Example</h2> <p><span class="error">* required field.</span></p> <form method="post" action="/hello.php"> Name: <input type="text" name="name" value=""> <span class="error">* </span> <br><br> E-mail: <input type="text" name="email" value=""> <span class="error">* </span> <br><br> Website: <input type="text" name="website" value=""> <span class="error"></span> <br><br> Comment: <textarea name="comment" rows="5" cols="40"></textarea> <br><br> Gender: <input type="radio" name="gender" value="female">Female <input type="radio" name="gender" value="male">Male <span class="error">* </span> <br><br> <input type="submit" name="submit" value="Submit"> </form> <h2>Your Input:</h2><br><br><br><br> </body> </html> """ |
To know what encoding it uses,
|
1 2 3 |
r.encoding #'UTF-8' |
Let’s change that to say,
|
1 |
r.encoding = 'ISO-8859-1' |
You might want to do this in any situation where you can apply special logic to work out what the encoding of the content will be. For example, HTTP and XML have the ability to specify their encoding in their body. In situations like this, you should use r.content to find the encoding, and then set r.encoding. This will let you use r.text with the correct encoding.
Requests will also use custom encoding in the event. If you have created your own encoding and registered it with the codecs module, you can simply use the codec name as the value of r.encoding and Requests will handle the decoding for you.
There’s also a builtin JSON decoder, in case you’re dealing with JSON data:
|
1 |
r.json() |
With every request you send to a HTTP server, the server will send you some additional data. You can get extract data from an HTTP response using:
|
1 2 3 |
print r.headers """{'Content-Length': '393', 'Content-Encoding': 'gzip', 'Vary': 'Accept-Encoding', 'Keep-Alive': 'timeout=5, max=100', 'Server': 'Apache/2.4.10 (Debian)', 'Connection': 'Keep-Alive', 'Date': 'Fri, 07 Jul 2017 14:09:24 GMT', 'Content-Type': 'text/html; charset=UTF-8'}""" |
Benefits of Requests.
This is the list of features from the requests site:
- International Domains and URLs
- Keep-Alive & Connection Pooling
- Sessions with Cookie Persistence
- Browser-style SSL Verification
- Basic/Digest Authentication
- Elegant Key/Value Cookies
- Automatic Decompression
- Unicode Response Bodies
- Multipart File Uploads
- Connection Timeouts
- .netrc support
- List item
- Python 2.6—3.4
- Thread-safe.
An awesome lotta features!Right?
To know more,
http://docs.python-requests.org/en/master/
http://docs.python-requests.org/en/latest/api/
http://pypi.python.org/pypi/requests
http://docs.python-requests.org/en/latest/user/quickstart/
http://isbullsh.it/2012/06/Rest-api-in-python/#requests
http://docs.python-requests.org/en/master/user/quickstart/
Python Django
What is Django?
Django is a high-level Python Web framework that encourages rapid development and clean, pragmatic design. When you’re building a website, you always need a similar set of components: a way to handle user authentication (signing up, signing in, signing out), a management panel for your website, forms, a way to upload files, etc. Python Django takes care of the repetitive work for you so that you don’t have to reinvent the wheel all over again.
Lets install Django
You can install Django using
|
1 |
$pip install django |
For other ways of installation, visit this.
Let’s get started
Since this is the first time we are using Django there is some initial setup to do. We need to auto generate some code that establishes the Django project.
From the command line,
|
1 |
$ django-admin startproject mysite |
This will create a folder ‘mysite ‘ in your current directory. Do avoid python names of different functionalities as names for the folder. Ex. Django and test are not good choices since they create conflict on calling.
Also, with Django you do not put your code under your web server’s root directory. We always place it outside.
Let’s look at what startproject created:
mysite/
manage.py
mysite/
__init__.py
settings.py
urls.py
wsgi.py
These files are:
- The outer mysite/ root directory is just a container for your project. Its name doesn’t matter to Django; you can rename it to anything you like.
- py: A command-line utility that lets you interact with this Django project in various ways. You can read all the details about manage.py in django-admin and manage.py.
- The inner mysite/ directory is the actual Python package for your project. Its name is the Python package name you’ll need to use to import anything inside it (e.g. urls).
- mysite/__init__.py: An empty file that tells Python that this directory should be considered a Python package. If you’re a Python beginner, read more about packages in the official Python docs.
- mysite/settings.py: Settings/configuration for this Django project. Django settings will tell you all about how settings work.
- mysite/urls.py: The URL declarations for this Django project; a “table of contents” of your Django-powered site. You can read more about URLs in URL dispatcher.
- mysite/wsgi.py: An entry-point for WSGI-compatible web servers to serve your project. See How to deploy with WSGI for more details.
Let’s verify whether our Django works.
|
1 2 3 4 5 6 7 8 9 10 11 12 13 14 15 16 17 18 19 20 21 22 23 |
root@localhost:/home/enfa/Desktop/GlobalSQA/mysite# python manage.py runserver Performing system checks... System check identified no issues (0 silenced). You have 13 unapplied migration(s). Your project may not work properly until you apply the migrations for app(s): admin, auth, contenttypes, sessions. Run 'python manage.py migrate' to apply them. July 07, 2017 - 15:28:53 Django version 1.11.3, using settings 'mysite.settings' Starting development server at http://127.0.0.1:8000/ Quit the server with CONTROL-C. |
You can safely ignore the warning for now.
Yipppe! We have started the Django server! Let’s go see how it looks like.
Note This is only for studying. When it comes to production setting, use Apache servers or similar.
By default the port is 8000. But you can change it using the command line. Say you want to change it to 8080
|
1 |
$ python manage.py runserver 8080 |
Full docs for the development server can be found in the runserver reference
But why Python Django?
- It’s the best choice for quick web development
- Transparent and clean code.
- Fewer lines of code
- Saves time and money on development
- works well with high loads
Why not Django?
- Doesn’t support real-time applications
- Broad knowledge of the system is required
- ORM is very monolithic compared to SQLAlchemy.
To know how to edit and configure your webpages, check out https://docs.djangoproject.com/en/1.11/intro/tutorial01/
For more details visit,
https://www.djangoproject.com/
https://docs.djangoproject.com/en/1.11/#index-first-steps
https://www.djangoproject.com/start/
https://docs.djangoproject.com/en/1.11/
https://tutorial.djangogirls.org/en/django_start_project/
Python Projects
Python is one of the most loved and powerful languages to code in. It’s an interpreted, object-oriented, high-level programming language with dynamic semantics. Python’s simple, easy to learn syntax makes it very easy to read and therefore reduces the cost of program maintenance. Python supports modules and packages, which encourages program modularity and code reuse.
After you play around with python, you would of course want to do something serious, like maybe a python project. Here, we have complied a list of top 4 sites where you could go and download python projects for your different needs, maybe for practice, references or sometimes for your final year projects. Hope this helps!
Free Projectz
You can download python project concept, abstract and source code for free at Free Projectz. Some of the interesting projects there are Doctor Appointment System, User Management, Live Photo Gallery etc.
Kashipara
With 300000+ members and 1500+ projects, you will find a variety of Python projects you can download and work on from Kashipara. They have a really good collection for mini and major projects and even have the best projects ranked on the basis of hits per day and month. Few interesting projects are ATM Software – Python, Online Video Chat – Python,Restaurant Management System – Python, TODO List – Python, Virtual Memory Management System – Python, Insta Raider – Python etc
Free Projects Code
Free Projects Code has a lot of sample mini and major projects that you can download and study. Few of them are Download Search Engine Python Script, Download Virtual Memory Management System, Download Video Chat Application, Internet Usage Monitoring System For Linux Systems, ATM Software Engineering Project, Web Based File Hosting and Syncing Service Project Report
1000 Projects
Below are some of the projects developed by 1000 Projects. Google Finance currency calculator API,using aprori on website to get relevant data, Game like tic tac toe ,Note/content sharing platform for college students, book information parsing tool developed for opencart, AI Crosswords, An algorithm for steganography of multiple heterogeneous files on a single video carrier etc. For downloads, visit the site.
Any projects or sites we missed? Let us know by commenting down below. We love hearing from you. Hope this list helped.
Have fun with Python!
Python Execution Time
Question:
Write a program to print the running time of execution of “1+1” for 100 times. Use timeit() function to measure the running time.
Program:
|
1 2 3 |
from timeit import Timer t = Timer("for i in range(100):1+1") print (t.timeit()) |
Explanation:
Runtime or execution time is the time during which a program is running (executing), in contrast to other program lifecycle phases such as compile time, link time and load time.
The Timer function keeps track of the time
Output:
|
1 |
1.8190948230039794 |
Best Python Books
Quora brings up a lot of interesting questions from all around the world. An avid Quora reader myself, I absolutely love reading through the different questions and answers there. One of the questions that interested me was “To learn a programming language is it better to learn from a book or on-line courses on the Internet?”
Well, that answer would totally depend on how you intend to learn. If you just want to learn the syntax then some online classes would be more than fine. If you really want to learn the real power behind the language, then an in-depth online course or better you could grab a good book on it. So to all those Python learners out there, here we have compiled a list of the best python books out there for you to learn.
BEGINNER:
1. Learning Python
Written by Mark Lutz and David Ascher, Learning Python offers a comprehensive in-depth introduction to the core of Python language for any beginner. It covers basic topics of both 2.7.X as well as 3.X in much detail. Some of the topics covered are Types & Operations, statements and Syntax, Functions and Generators, Modules and packages and much more. The beginner chapter, a Q&A session on Python and especially why Python is a major highlight. The end chapter quizzes enable the reader to challenge himself on the topics covered. Therefore leaning Python is one of the best choices to get started in Python.
2.Learn Python the Hard way
Written by Zed Shaw and offered for free as pdfs. Learn python the hard way will give beginners with a perfect insight to the very basics. You can also learn a variety of basic things such as how to use the terminal or the text editor. This book focuses on more on learning by doing than subject theory. therefore for an absolute beginner, Learn Python the hard way is a good choice.
3.A Byte of Python
Targeted for the absolute beginners in programming, author Swaroop C. H has kept it short and brief. With a user-friendly introduction, and focus on scripting simple but meaningful programs. A Byte of Python is the best choice for a beginner to learn Python briefly.
INTERMEDIATE:
1.Python Essential Reference
Written by David M. Beazley, this book is the perfect go to reference book on Python. All the new features such as new style classes, unification of types and classes, xmlrpclip, intertools, bz2 and optparse the new library modules are all covered in the updated edition of this book which makes it the most up-to date book on Python in the market. Written in a clear and organized manner, it gives you a detailed overview and an insight to the real power of programming. For someone with a bit of basics and want to learn Python, Python Essential Reference is a must read.
2.Python CookBook
Written by David Beazley and Brian K. Jones, Python CookBook is for readers with a basic knowledge of Python. Readers who want to learn more on concepts such as data structure, data encoding and processing, functions, algorithms, classes and objects, system administration, modern tools and idioms, generators and iteration methods would find Python CookBook to be the best guide. Each recipe contains code samples written and tested in python 3.3, so that you can get to using them right away. For someone who wants to be good on Python, Python CookBook is a must read.
3. Scientific Computing in Python
Authored by Claus Führer, Jan Erik Solem, Olivier Verdie, Scientic Computing in Python3 demonstrates how to use Python for computing purposes such as in linear algebra, arrays, plotting, iterating, functions, polynomials, and much more. You get to explore numerical computing and mathematical libraries with SciPy and NumPy modules. Covering all major concepts and tools in scientific computing, this book is your go to guide and best reference for the same.
ADVANCED:
1.Black Hat python
Author Justin Seitz has aced how to teach security skills in python in his book Black Hat python. Targeted only for advanced Python users, this book comes as a huge boon for hackers and penetration testers to write better networking sniffers, infect virtual machines and manipulate packets and develop better hacker tools using python. A must have for any wanna be Hacker in Python.
2.Python for Data Analysis
Data Anaysis is all about collecting, cleaning, processing, crunching and studying raw data to bring out better insights on the subject matter. One of the best tools used in Python for the same is the pandas library and Wes Mckinney, one of the main authors of the pandas library has brought out a hands on book packed with practical case studies to guide you through understanding and implementing various tools and libraries used for the same. Easy to read and targeted for advanced Python users, Python for Data Analysis is your comprehensive guide to data analysis in Python.
3.Violent Python: A Cookbook For Hackers, Forensic Analysts, Penetration Testers And Security Engineers
TJ O’Connor in his book Violent Python: A Cookbook For Hackers, Forensic Analysts, Penetration Testers And Security Engineers teaches you concepts in security, hacking, forensics, tool integration for complicated protocols etc in the most simple and easy to understand style. You can also learn how to automate large network attacks, extract meta data, intercept and analyze network traffic, spoof wireless frames to attack wireless and bluetooth devices, data mine social media websites and so on. In terms of language and concepts, TJ O’Connor has aced how to teach the advanced topics in python in simple terms, bringing out the perfect go to book for the same.
Have more books to add-on to this list? Comment them below, we would love to hear from you.
Meanwhile, Have fun with Python!
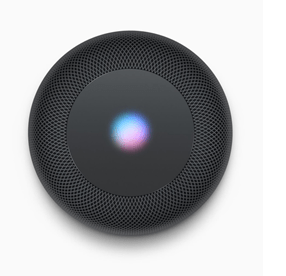
Apple HomePod

Apple joins in the race of voice enabled virtual assistant device with HomePod. It can respond to human commands and control smart home gadgets. However , Apple insists that it is primarily a music device with superior audio powered by it’s long standing voice assistant Siri. According to Apple CEO Tim Cook “The thing that has arguably not gotten a great level of focus is music in the home. So we decided we would combine great sound and an intelligent speaker”.
Release and Availability
HomePod will be released in the US, UK and Australia in December 2017. Initially, it would only support English language voice commands.It will be available in other countries starting 2018.
Cost
It will cost US $349. That’s more than double the cost of Google and Amazon’s alternatives, typical apple style. However , many apple fans will still be loyal to it and would love to see what it brings to the table. Apple says that when kept in center of room it plays sound in all directions and if kept in corner it will aim the output away from the wall. It can also act as stereo speaker by connecting to other sound devices. If the claims come out to be true , it might be worth the extra cash.
Appearance

HomePod is a heavy-looking cylindrical gadget nearly 7 inch tall that comes with seven tweeter beam forming array, six microphones , a four-inch woofer for a more immersive experience. It has iPhone A8 chip that determine the size and layout of the room which will adapt sound quality to fit the room.
HomePod is designed for voice control with an array of six microphones, so users can interact with it from across the room, even while loud music is playing. You can tap the top of HomePod to play , pause or adjust volume. LED waveform on top indicate whether Siri is listening.
Since it’s yet unreleased, not much can be said about it’s qualitative aspects.
Security
Security is fundamental aspect of any data based technology, therefore, all data is stored locally on your device and is sent to servers via cryptic methods using anonymous Siri Id. So, there is nothing to fret about with HomePod around. Your identity and information is safe.
Personal assistance
It springs into life on hearing “Hey Siri”. It’s personal assistance roles include news briefings, language translation, weather, traffic info, set reminders, play podcasts among others. Simply speaking we can ask Siri , any question we generally need browsing or app launching for.
“Hey Siri , set an alarm for 7 am tomorrow”.
“Hey Siri , Did Delhi Daredevils win last night?”
Integrations
It will likely work with Apple’s established HomeKit partners: Ecobee, Honeywell, Chamberlain, D-Link, Philips Hue, Lutron, iDevices and more. However ,the only music streaming service that is supported by Homepad is Apple Music. Users of other popular platforms like Spotify will be disappointed. But this is not new for apple users.
HomePod can also send text messages to others. Like it’s counterpart it offers many tools to help around house such as calendar synchronization, kitchen timers and alarms.
Comment and share this post if you like it and want us to add more posts like this.
Other Assistants by Amazon
Amazon added new products to the battle of smart speakers, namely, Amazon Echo Dot and Amazon Tap. Both differ slightly from their predecessor in traits however, core values remain the same.
Amazon Echo Dot

Echo Dot is the mini version of Amazon Echo and still provides all Alexa’s quirks.
However, it does compromises on the quality of speaker to cut down on cost. A smaller built-in speaker does let you talk to Alexa, but it’s not good enough for streaming music. Also, it needs to be plugged in to work.
You might have to connect your own Bluetooth speakers through Bluetooth or 3.5 mm stereo cable to play music from Amazon Music, Spotify, Pandora, iHeartRadio, and TuneIn.
The Dot comes at an affordable price of $49.
BUY NOW
Amazon Tap
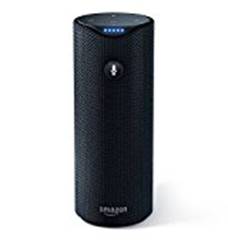
The Amazon Tap is another Wi-fi enabled digital assistant which takes the Echo’s fundamentals and packs them into a portable Bluetooth speaker. It is 6.5 inches tall and 2.5 inches wide , lasts for about 9 hours once fully charged. Unlike it’s counterparts, the Tap isn’t always listening. Instead, you have to press a mic button to speak to Alexa, which is disheartening to most users, but this is required to preserve the battery life. However, a recent update does allow you to enable hands-free listening at the expense of battery life.
It comes at a price of $129.
BUY NOW
Comment and share this post if you like it and want us to add more posts like this.
Amazon Echo vs. Google Home vs. Apple HomePod
Amazon Echo vs. Google Home vs. Apple HomePod
Intelligent voice controlled devices are among the latest trends and deciding the one that suits you best is troublesome. Amazon echo and Google Home are major rivals in the battle with Apple HomePod being a new entrant. With so much information available on what each device can or cannot do, one is left overwhelmed.
Here is a comparison of these devices listing both similarities and dissimilarities and stating which stands out in certain areas and which needs work.
Price
Amazon echo is priced at $179.99. However, the lowest amount that can get you Alexa, Echo dot, is mere $50, courtesy Amazon which always has been aggressive in pricing. Apple’s HomePod, like most Apple products, comes at a premium price of $349. An affordable alternative is Google Home at $129.
Design
HomePod is stout , cylindrical with glowing area on top similar to the siri logo indicating when siri is listening.

Home has pretty plum like design,comes in various colors and finishes with upper section displaying google logo whereas volume and play/pause controls and speakers in the lower section.


Echo is longer cylinder with lower section as speakers. The top rim glows blue indicating ‘listening’ and two action buttons are also on top.

Music playlists
Music playback in HomePod limited to Apple Music only. On other hand, Home offers connection to Google Play Music, Spotify, Pandora, Deezer and more while Alexa can connect to Amazon Music, Spotify, Audible and Pandora. This shows limits of HomePod.
Specs
- Echo and Home essentially are similar in intent. Both are mid range voice enabled virtual assistants.
- Both have built-in mics to receive commands and respond intelligently via speakers. Also , they connect to other smart devices and operate them. However , as far as assistance is concerned Google is a leader in the area with it’s unmatched history with user and search data.
Contrary to these, Apple characterizes HomePod as a powerful wireless speaker that has Siri at it’s service, helping it carry out other smart operations and provide assistance.
- The Echo has seven microphones waiting for trigger words while Home only has two mics with it and therefore, sometimes takes few seconds to awaken.
- Home has only one 2in driver while Echo has two speakers; one woofer and one tweeter. The HomePod stands out with 4in upwards facing woofers. This will lead to an immersive sound experience with sound adapting to room space and layout.
The HomePod will definitely offer a better audio experience than Home or Echo.
Personal assistance
- Both Echo and Home offer similar services but their performance on Ground zero is relative and dependent on many factors.
- Both can hear from a good 50 m distance without being confused with noise. However , Home’s voice recognition stands out. No much can be said about HomePod since it isn’t released yet.
- According to a practical test conducted by Jay McGregor from Forbes , comparing Echo and Home, Home took home gold. You can read about it here.
- Home is better with web results and Echo is better with shopping related queries.
- Home is more conversational. It remembers context.
Smart Home
- Google Home and Amazon Echo can easily work with iOS and Android devices. Application is needed to configure them and connect them to cloud.
- Amazon steps up in Smart Home department since Echo supports large number of smart devices in comparison to other two, nearly 11k in contrast to 200 for Home.
- The Home handles August, Belkin Wemo, Frigidaire, Honeywell, Insignia, Lifx, Logitech Harmony, Next, Philips, Rachio, Samsung, TP-Link, and Wink, along with anything with a Chromecast attached to it.
- The Echo supports all of those except Chromecast, but adds Blink, Carrier, DigitalStrom, Haiku, Leviton, Lowe’s Iris, Lutron, Netatmo, and many other kinds of devices.
- Home enjoys an edge by supporting streaming services like HBO now.
The Echo remains a popular choice as of now with reasonable prices and huge skill set. However, Home is fast catching up with better sound quality and assistance. HomePod is yet to be discovered but it is definitely promising.
Comment and share this post if you like it and want us to add more posts like this.
Setting Up Echo Dot

- Download the Alexa app from app store and sign in using your amazon account.
You can also select a link below:
- Turn on Echo Dot.
- Plug the included power adapter into Echo Dot and then into a power outlet.
- The light ring on Echo Dot turns blue, and then orange.
- When the light turns orange, Alexa greets you.
- Connect Echo Dot to a WiFi network.
- In Alexa app, open the left navigation panel and then select Settings.
- Select your device and then select Update WiFi. If you’re adding a new device to your account, select Set up a new device
- On your Echo dot, press and hold the Action button. The light ring changes to orange, and your mobile device connects to your Echo dot. A list of available WiFi networks appear in the app.
- Select your WiFi network and enter the network password (if required). If you don’t see your WiFi network, scroll down and select Add a Network (for hidden networks) or Rescan.
- Select Connect. After your device connects to your WiFi network, a confirmation message appears in the app.
- Echo Dot is ready to use.
- Your Echo device is ready for use.
- To get started, say the wake word-”Alexa” which is default and then speak natural English commands to Alexa.
- You can use the Alexa app to change the wake word at any time.
- In the app, go to Settings, select your Echo device, and then select Wake word.
If you are looking for video tutorial:
Comment and share this post if you like it and want us to add more posts like this.
Top Recommended PHP Books
PHP is the mostly commonly used language for Website and Web Application Development. It is a general purpose, server-side scripting language run a web server that’s designed to make dynamic pages and applications. PHP as a web development option is secure, fast and a reliable that offers lots more advantages to make it accessible to a lot of people.
Below are some Recommended PHP Books for Beginner, Intermediate and Advanced students.
BEGINNER
Head First PHP & MySQL – Lynn Beighley

Head First PHP & MySQL is the good book to start learning building dynamic websites using PHP and MySQL. You can create and populate your own MySQL database tables, and work with data stored in files . Use of exercises quizzes and puzzles turns this series into bestseller. You’ll build sophisticated examples — including a mailing list, a job board, and an online dating site — to help you learn how to harness the power of PHP and MySQL in a variety of contexts.
What you’ll learn
- Use cookies and sessions to track visitors’ login information and personalize the site for users
- Protect your data from SQL injection attacks
- Use regular expressions to validate information on forms
- Dynamically display text based on session info and create images on the fly
- Pull syndicated data from other sites using PHP and XML
- Advanced topics like session IDs, cookies, sessions, form validation, database queries and joins, file I/O operations etc.
PHP and MySQL for Dynamic Web Sites: Visual QuickPro Guide (4th Edition) – Larry Ullman

- With step-by-step instructions, complete scripts, and expert tips to guide readers, veteran author and database designer Larry Ullman gets right down to business.
- After grounding readers with separate discussions of first the scripting language (PHP) and then the database program (MySQL), he goes on to cover security, sessions and cookies, and using additional Web tools, with several sections devoted to creating sample applications.
- This guide is indispensable for beginning to intermediate level Web designers who want to replace their static sites with something dynamic.
- In this edition, the bulk of the new material covers the latest features and techniques with PHP and MySQL.
- Also new to this edition are chapters introducing jQuery and object-oriented programming techniques.
- The contents of current edition of the book were updated to correspond to version 5.3 of PHP and version 5.5 of MySQL.
Learning PHP, MySQL & JavaScript: With jQuery, CSS & HTML5 (Learning Php, Mysql, Javascript, Css & Html5) 4th Edition –
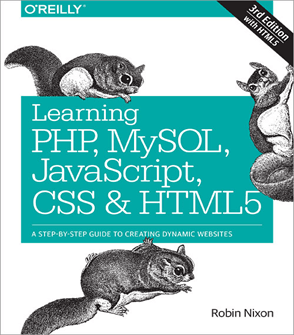
This book is for people who already have a fundamental understanding of HTML and are looking to create effective and dynamic websites, such as graphic designers who are already creating static websites but wish to take their skills to the next level, as well as high school and college students, recent graduates, and self-taught individuals. It provides a thorough grounding on core technologies such as PHP, MySQL, JavaScript, CSS, and HTML5, and jQuery library.
This book will help you:
-Understand PHP essentials and the basics of object-oriented programming
-Master MySQL, from database structure to complex queries
-Create web pages with PHP and MySQL by integrating forms and other HTML features
-Make Ajax calls and turn your website into a highly dynamic environment
-Upload and manipulate files and images, validate user input, and secure your applications
INTERMEDIATE
PHP & MySQL For Dummies – Janet Valade

Using this book , you can build a online catalog and members only interactive website.
You’ll learn :
- Get familiar with the terms PHP , MySQL
- Their installation.
- Store data in your database and query it via PHP and display it on your Website
- Build PHP scripts that uses up to date code.
- See how the language and database work together to produce dynamic Web pages with less hassle.
- Deliver secure and sound website with proper documentation.
The book is recommended for someone acquainted with nuances of programming but is new to PHP.
PHP & MySQL: Novice to Ninja: The Easy Way to Build Your Own Database Driven Website 5th Edition – Kevin Yank

An intermediate level book to speed up your PHP integration with database (MySQL). Through this book, you can get acquainted with best database design and principles. It contains installation process of PHP, MySQL. Takes on an explanatory approach and helps you build your first database. Working example is used in entire book, so that new concepts learnt can be incorporated practically. You will be creating a live web based Content Management System and a functional e-commerce system.
What’s new ?
- Up to date: Updated for Windows 7, Mac OS X Lion, and the latest versions of PHP, MySQL, phpMyAdmin, XAMPP and MAMP.
- Latest edition of book recommends using all-in-one installation packages like XAMPP and MAMP, and moves the brittle manual setup instructions to an appendix at the end of the book.
- Uses the more robust and portable PHP Data Objects (PDO) API and prepared statements to work with MySQL.
- Easy-to-read HTML5 markup is used.
- Object oriented programming (OOP) primer is introduced
ADVANCED
Advanced PHP Programming – George Schlossnagle

The rapid maturation of PHP has created a skeptical population of users from more traditional “enterprise” languages who question the readiness and ability of PHP to scale, as well as a large population of PHP developers without formal computer science backgrounds who have learned through the hands-on experimentation while developing small and midsize applications in PHP. While there are many books on learning PHP and developing small applications with it, there is a serious lack of information on “scaling” PHP for large-scale, business-critical systems.
Schlossnagle’s Advanced PHP Programming fills that void, demonstrating that PHP is ready for enterprise Web applications by showing the reader how to develop PHP-based applications for maximum performance, stability, and extensibility.
The book covers a variety of advanced topics such as design patterns, error handling, templates, unit testing, caching, databases, performance tuning and extending the language.
PHP Objects, Patterns, and Practice – Matt Zandstra
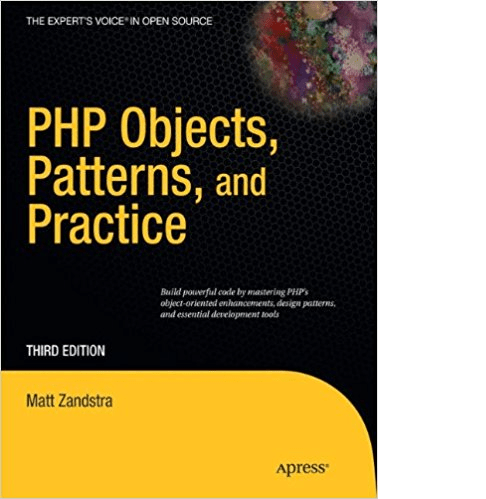
PHP Objects, Patterns, and Practice shows you how to blend the power of PHP with the sound enterprise development techniques embraced by professional programmers. It goes beyond the basic programming and will elucidate advanced topics such as working with static methods and properties, abstract classes, interfaces, design patterns, exception handling, and more.
You’ll learn to
- Write solid, maintainable code by embracing object oriented techniques and design patterns.
- Create detailed, versatile documentation using the powerful phpDocumentor automated documentation system.
- Gain new flexibility during the development process by managing your code within a CVS repository.